
Omni-Channel Message Routing in Salesforce
If your use case requires distributing new chats to agents through a queue, Omni-Channel message routing does that: define the rules for each queue and how work is distributed among your agents.
Last updated 28 Nov 2025Enable Omni-Channel message routing
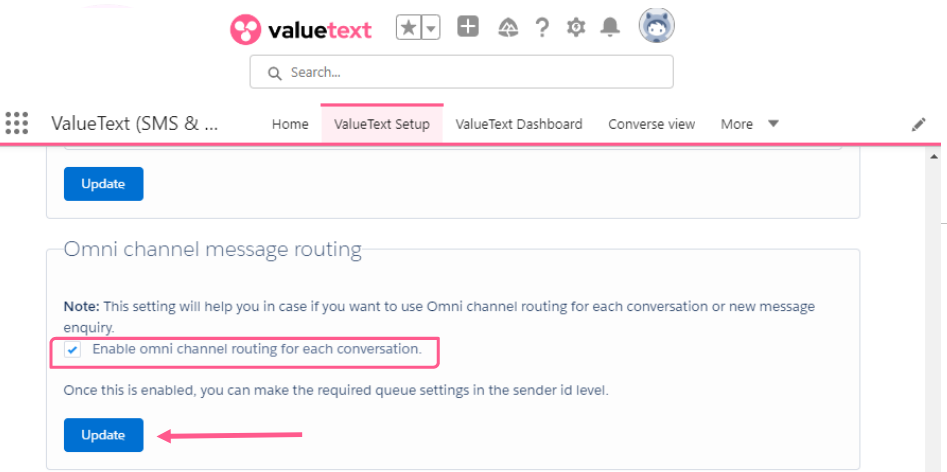
Go to ValueText Setup, open Omni Channel Message Routing, check the box below, and click Update.
Configure the sender ID queue
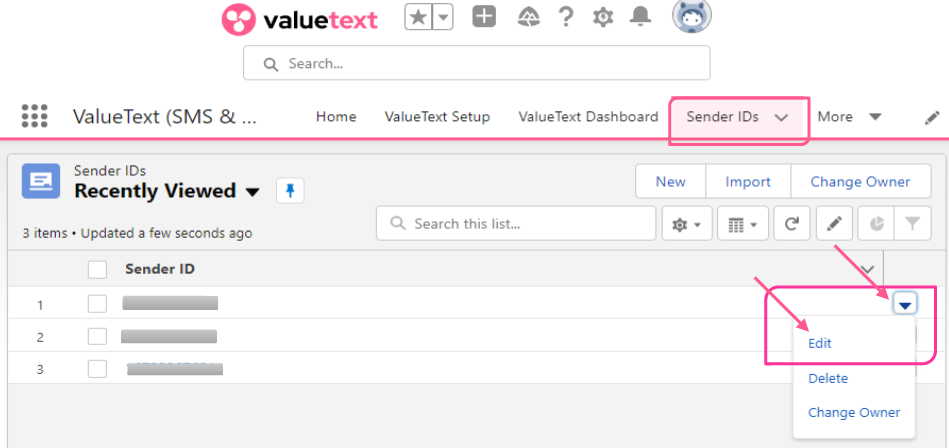
Go to the Sender IDs tab and edit your sender ID.
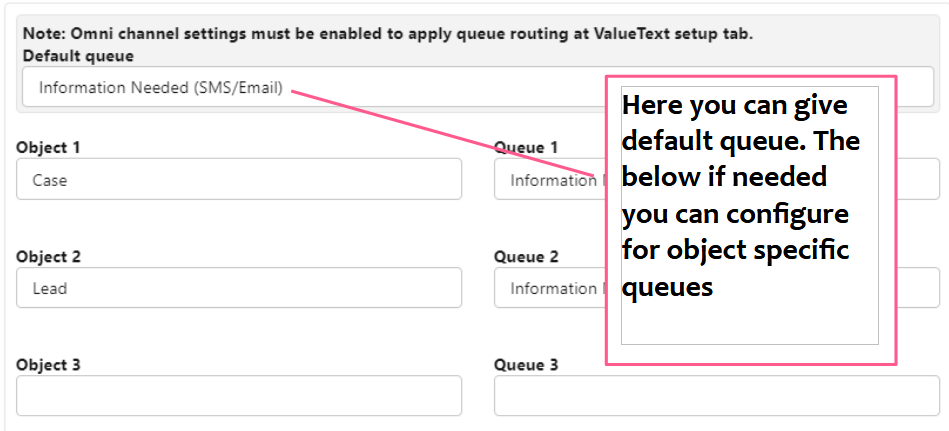
From here, you can enable a default queue for Omni-Channel, or configure a queue for a specific object, as shown below. Click Edit and configure it to match your requirements, the same way as the example below.
Turn on Omni-Channel in Salesforce Setup
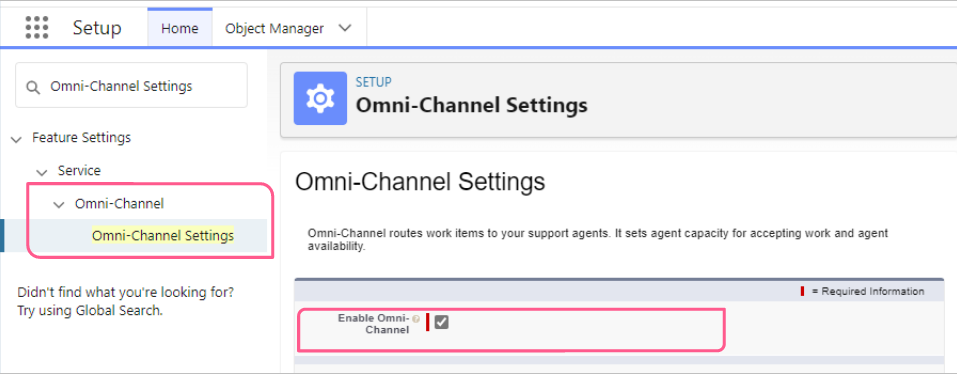
Go to Omni-Channel Settings in Salesforce Setup, enable the checkbox shown below, and click Save.
Create a service channel
Create a Service Channel for the object you want to route, and click New.
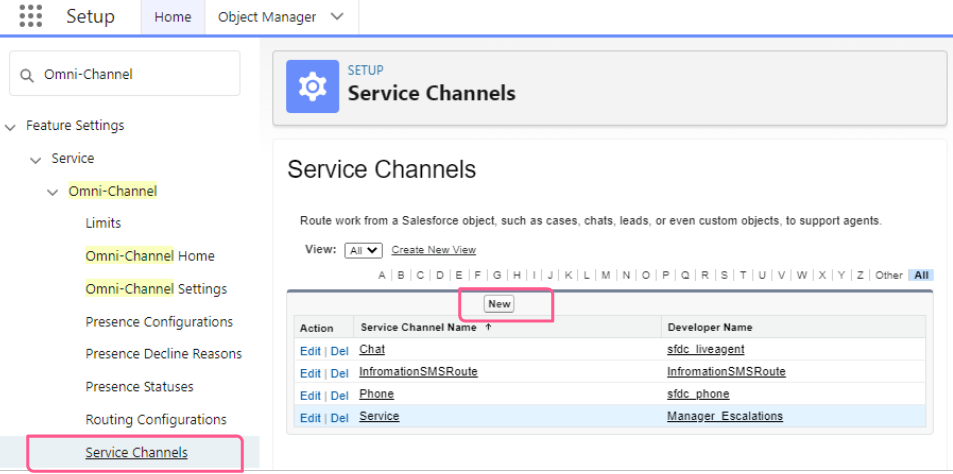
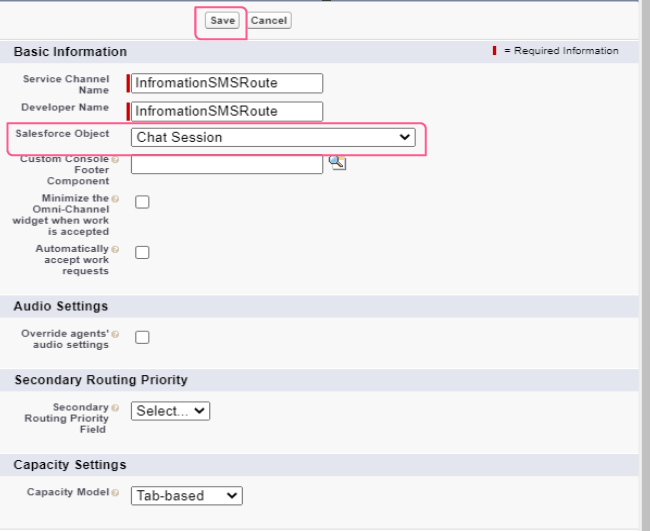
Name the service channel, select the object (Chat Session), and click Save.
Create a routing configuration
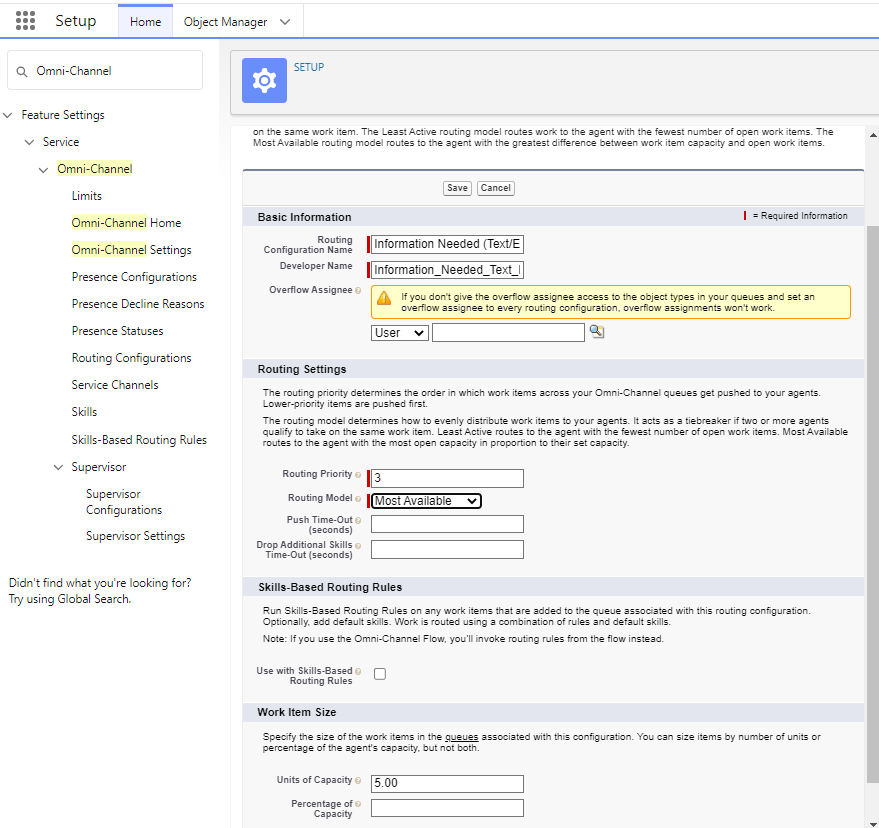
Create a Routing Configuration.
Assign the routing configuration to a queue
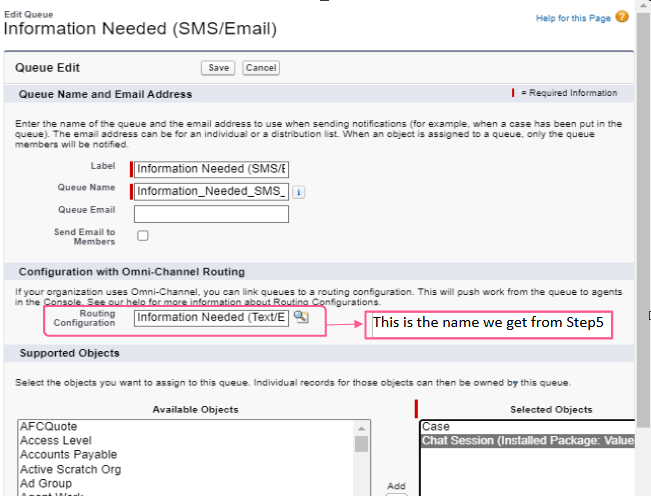
Assign the routing configuration to a queue. Remember the name you gave it in the previous step, you will need it here.
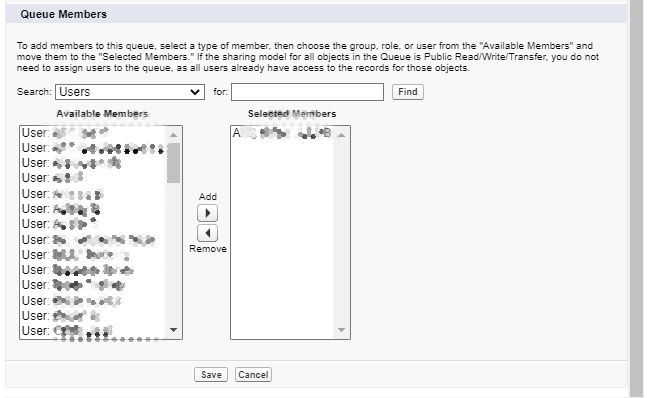
Create a new queue, add the Chat Session object to it, and add your users to the queue, as shown below.
Create a presence configuration
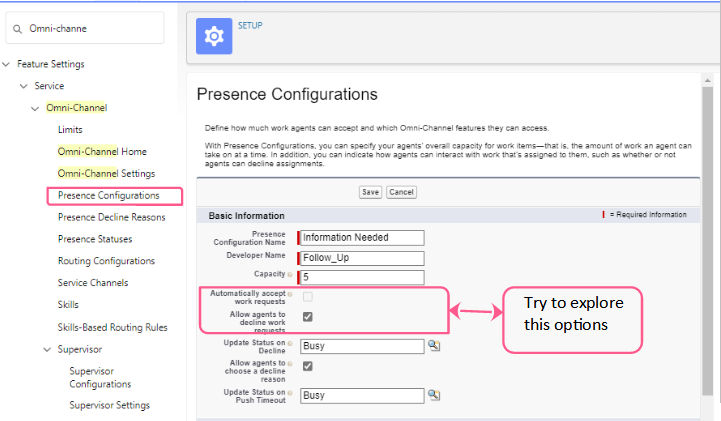
Create a Presence Configuration.
Create presence statuses
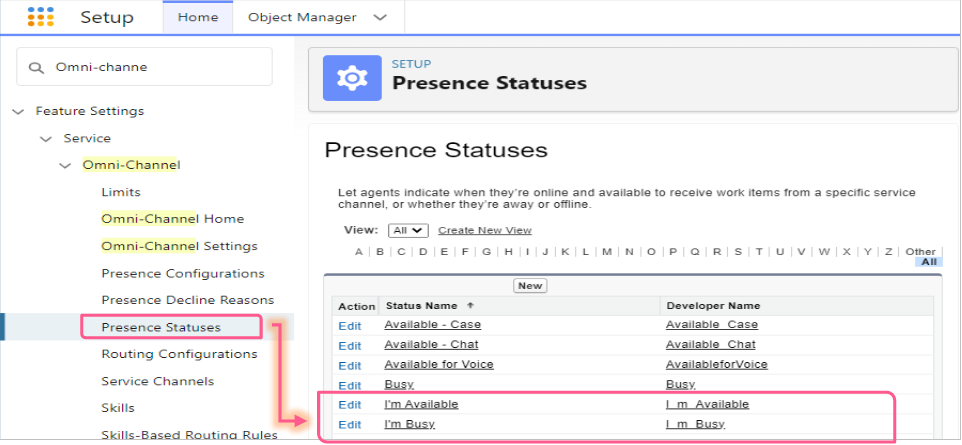
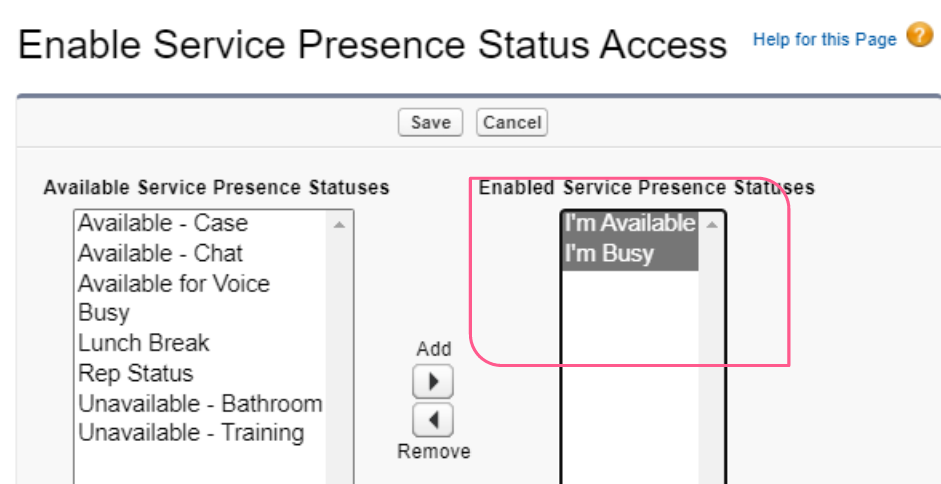
Create a Presence Status. In this example, we created two: "I'm Available" and "I'm Busy".
Assign presence statuses to a profile
Assign the statuses to the profiles that need them. Go to the required profile and refer to the image below.
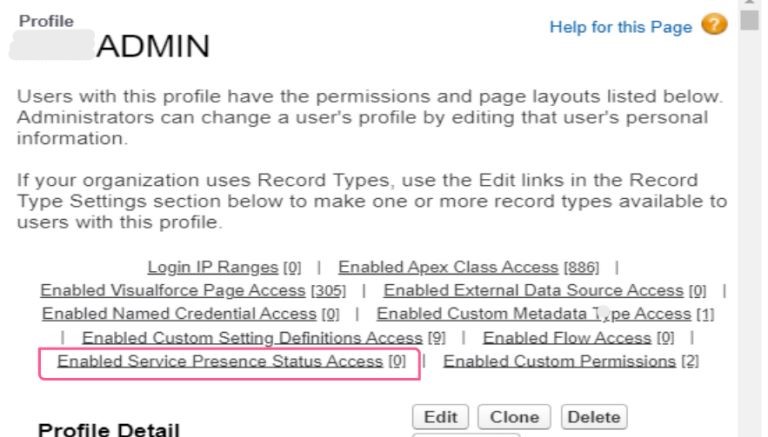
Add the statuses and click Save.
Add Omni-Channel to the user's interface
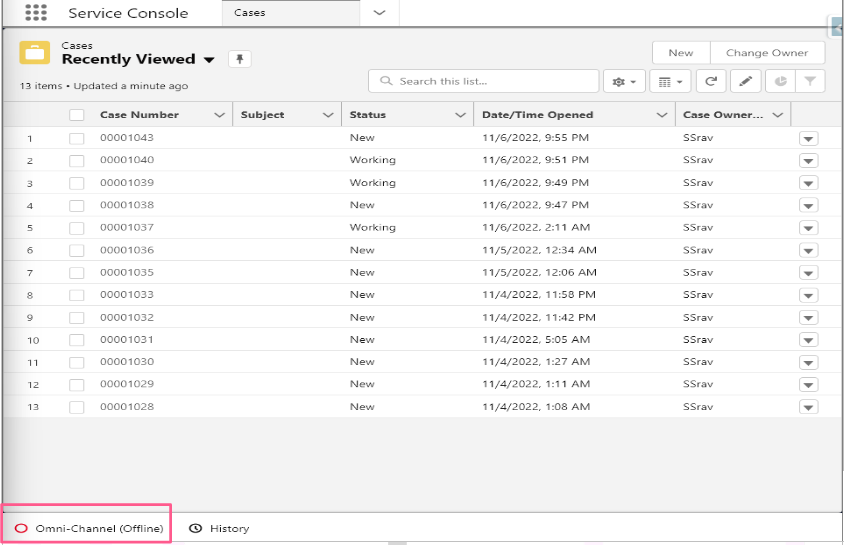
Add the Omni-Channel widget to the console:
- Open the App Manager and edit the required application (Service Console).
- Search for Utility Items.
- Add a new utility item.
- Choose Omni-Channel.
- Click Save.
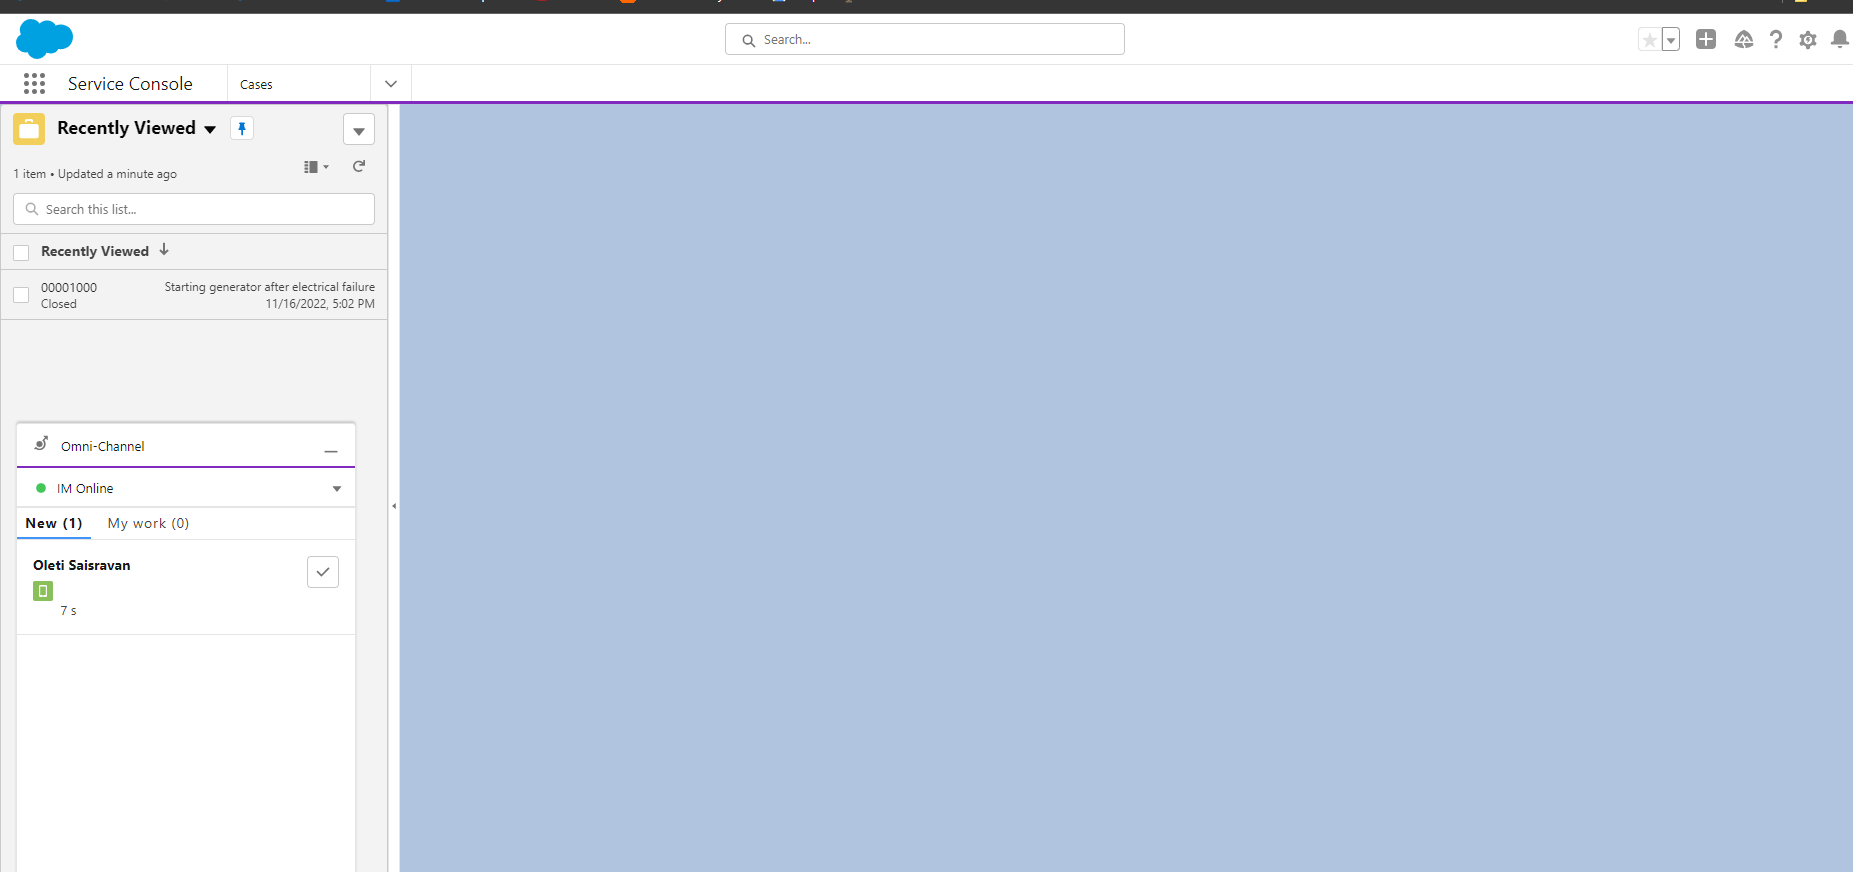
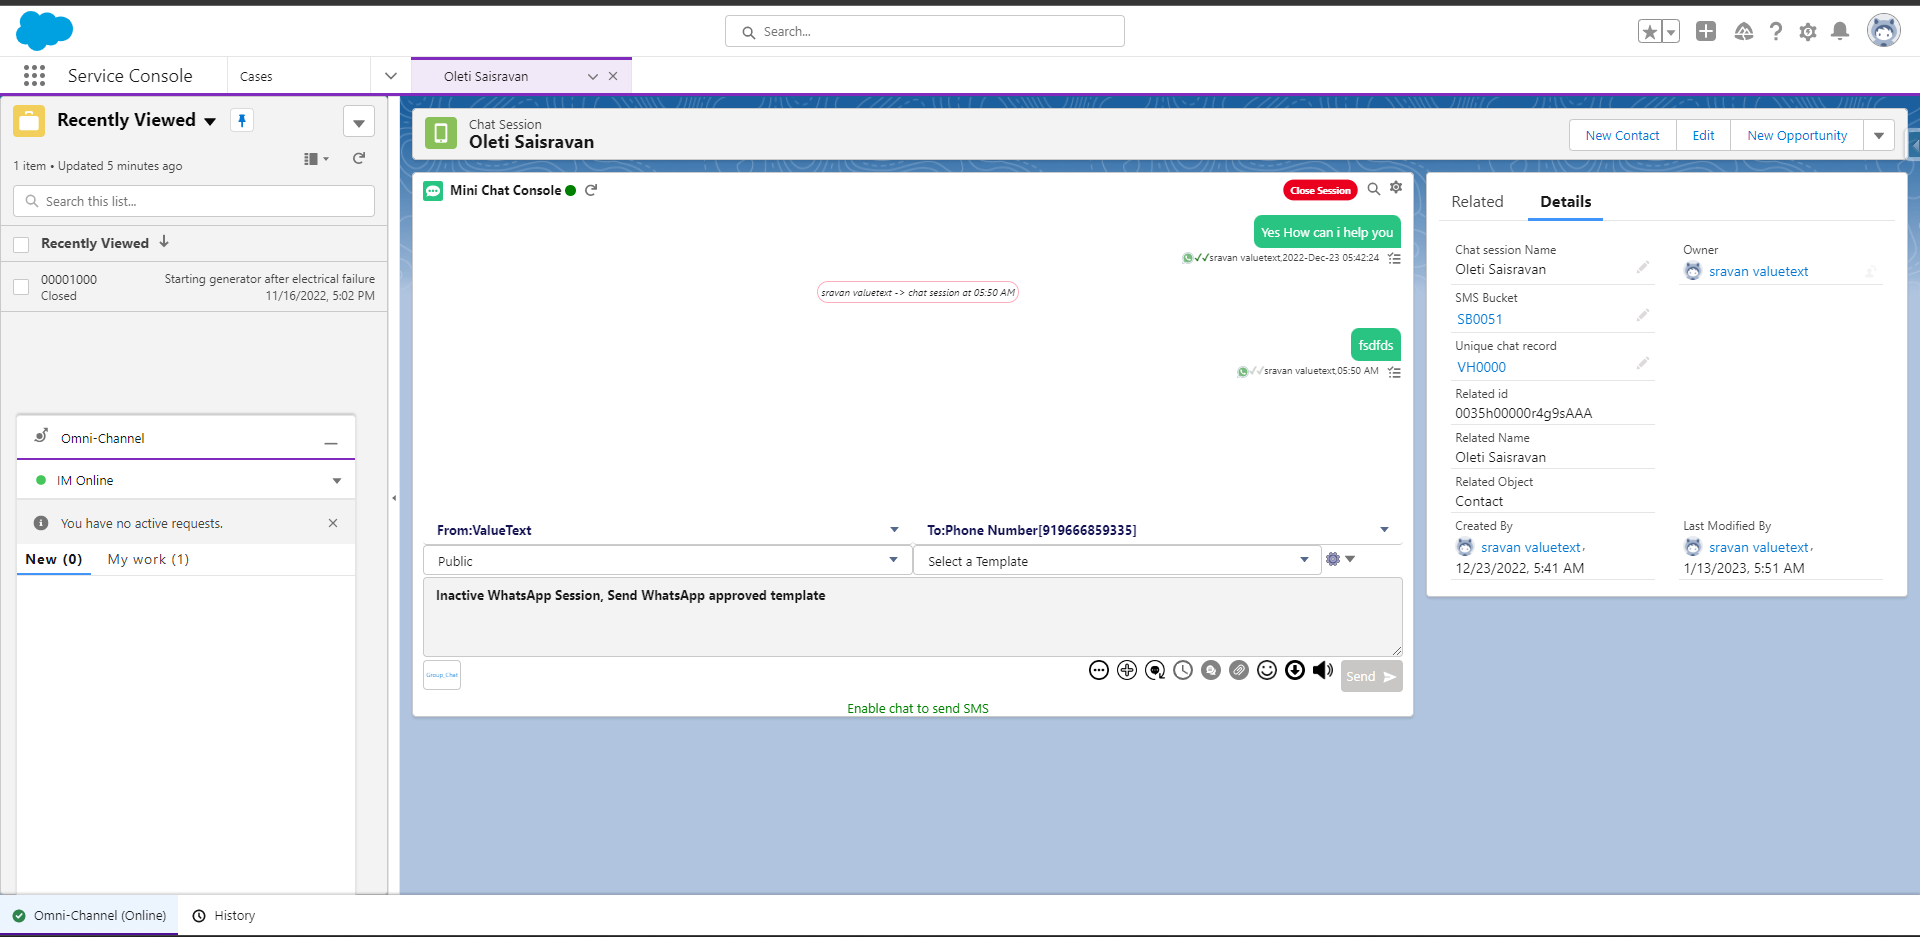
Whenever a new chat session comes in, it is assigned to an available user. When the user accepts the new chat, a Mini Chat Console opens so the agent can communicate with the customer.
At the end, your page should look like the image below.
Notes
- Routing depends entirely on Omni-Channel: if Omni-Channel is off or misconfigured, chat sessions will not route.
- If a user does not get the notification, enable the Service Cloud User checkbox on that user's record.